
The Small Highlight
in 8 steps
Step 1: Getting set up.
By the end of this video, you should understand:
We use 23.976 timelines.
We have 2 companies.
Double check the length of the highlight.
Slow anything shot in 60 FPS by 40%.
Step 2: Choosing the right audio.
Approved wedding audio for the highlight:
An origin story about how the couple first met or got engaged.
A funny part of the reception speeches/ funny officiant audio.
Any audio from the couple's vows public, private vows, letter reading.
"You may now kiss the bride".
Ambient laughs and claps.
End of Toast audio- well wishes
Hint: If guests or the couple laugh, its good audio!
Please do not use the following audio:
Generic audio about love (Ex: “love is patient, love is kind…”)
Adjectives about the couple (Ex: “She is so kind”, “He’s a great person”
Use a story about the couple instead (Ex: “He’s so kind she gave me the shirt off his back. He gave his pants too!”
Last note: Feel free to shorten audio but make sure the audio sampled still makes sense. Ask yourself if the audio clip needs more context?
Step 3: Soundscape & Jumpcuts
By the end of this video, you should understand:
Where to place the audio.
How to combine music with the first look/first kiss for emotional impact.
How to time jump cuts to the beat to keep audience attention.
Step 4: Start with the couple having fun
By the end of this video, you should understand:
Begin with lively, candid couple footage.
No wedding audio in the beginning. Just music.
Feel free to add some ambient music, risers or atmospheres to the beginning of the song if it needs it.
Part 5: Prep to The Kiss
By the end of this video, you should understand:
Most of the wedding audio used should be funny.
It can be from the ceremony or reception
Origin stories and anecdotes work great here.
Prioritize candid clips where people laugh!
Please include all first looks.
Please include at least some of the vows and end this section with “You may now kiss the bride…(or groom)”
Fade out audience claps.
Part 6: The Reception & The End
At the end of this video you should understand:
After the altar kiss, prioritize reception & bridal party fun.
The audio from the end of toasts works perfectly here.
End the video with:
a clip of the couple
their centered names “NAME + NAME”
then cross dissolve to the correct bumper.
Fonts and bumpers can be downloaded here.
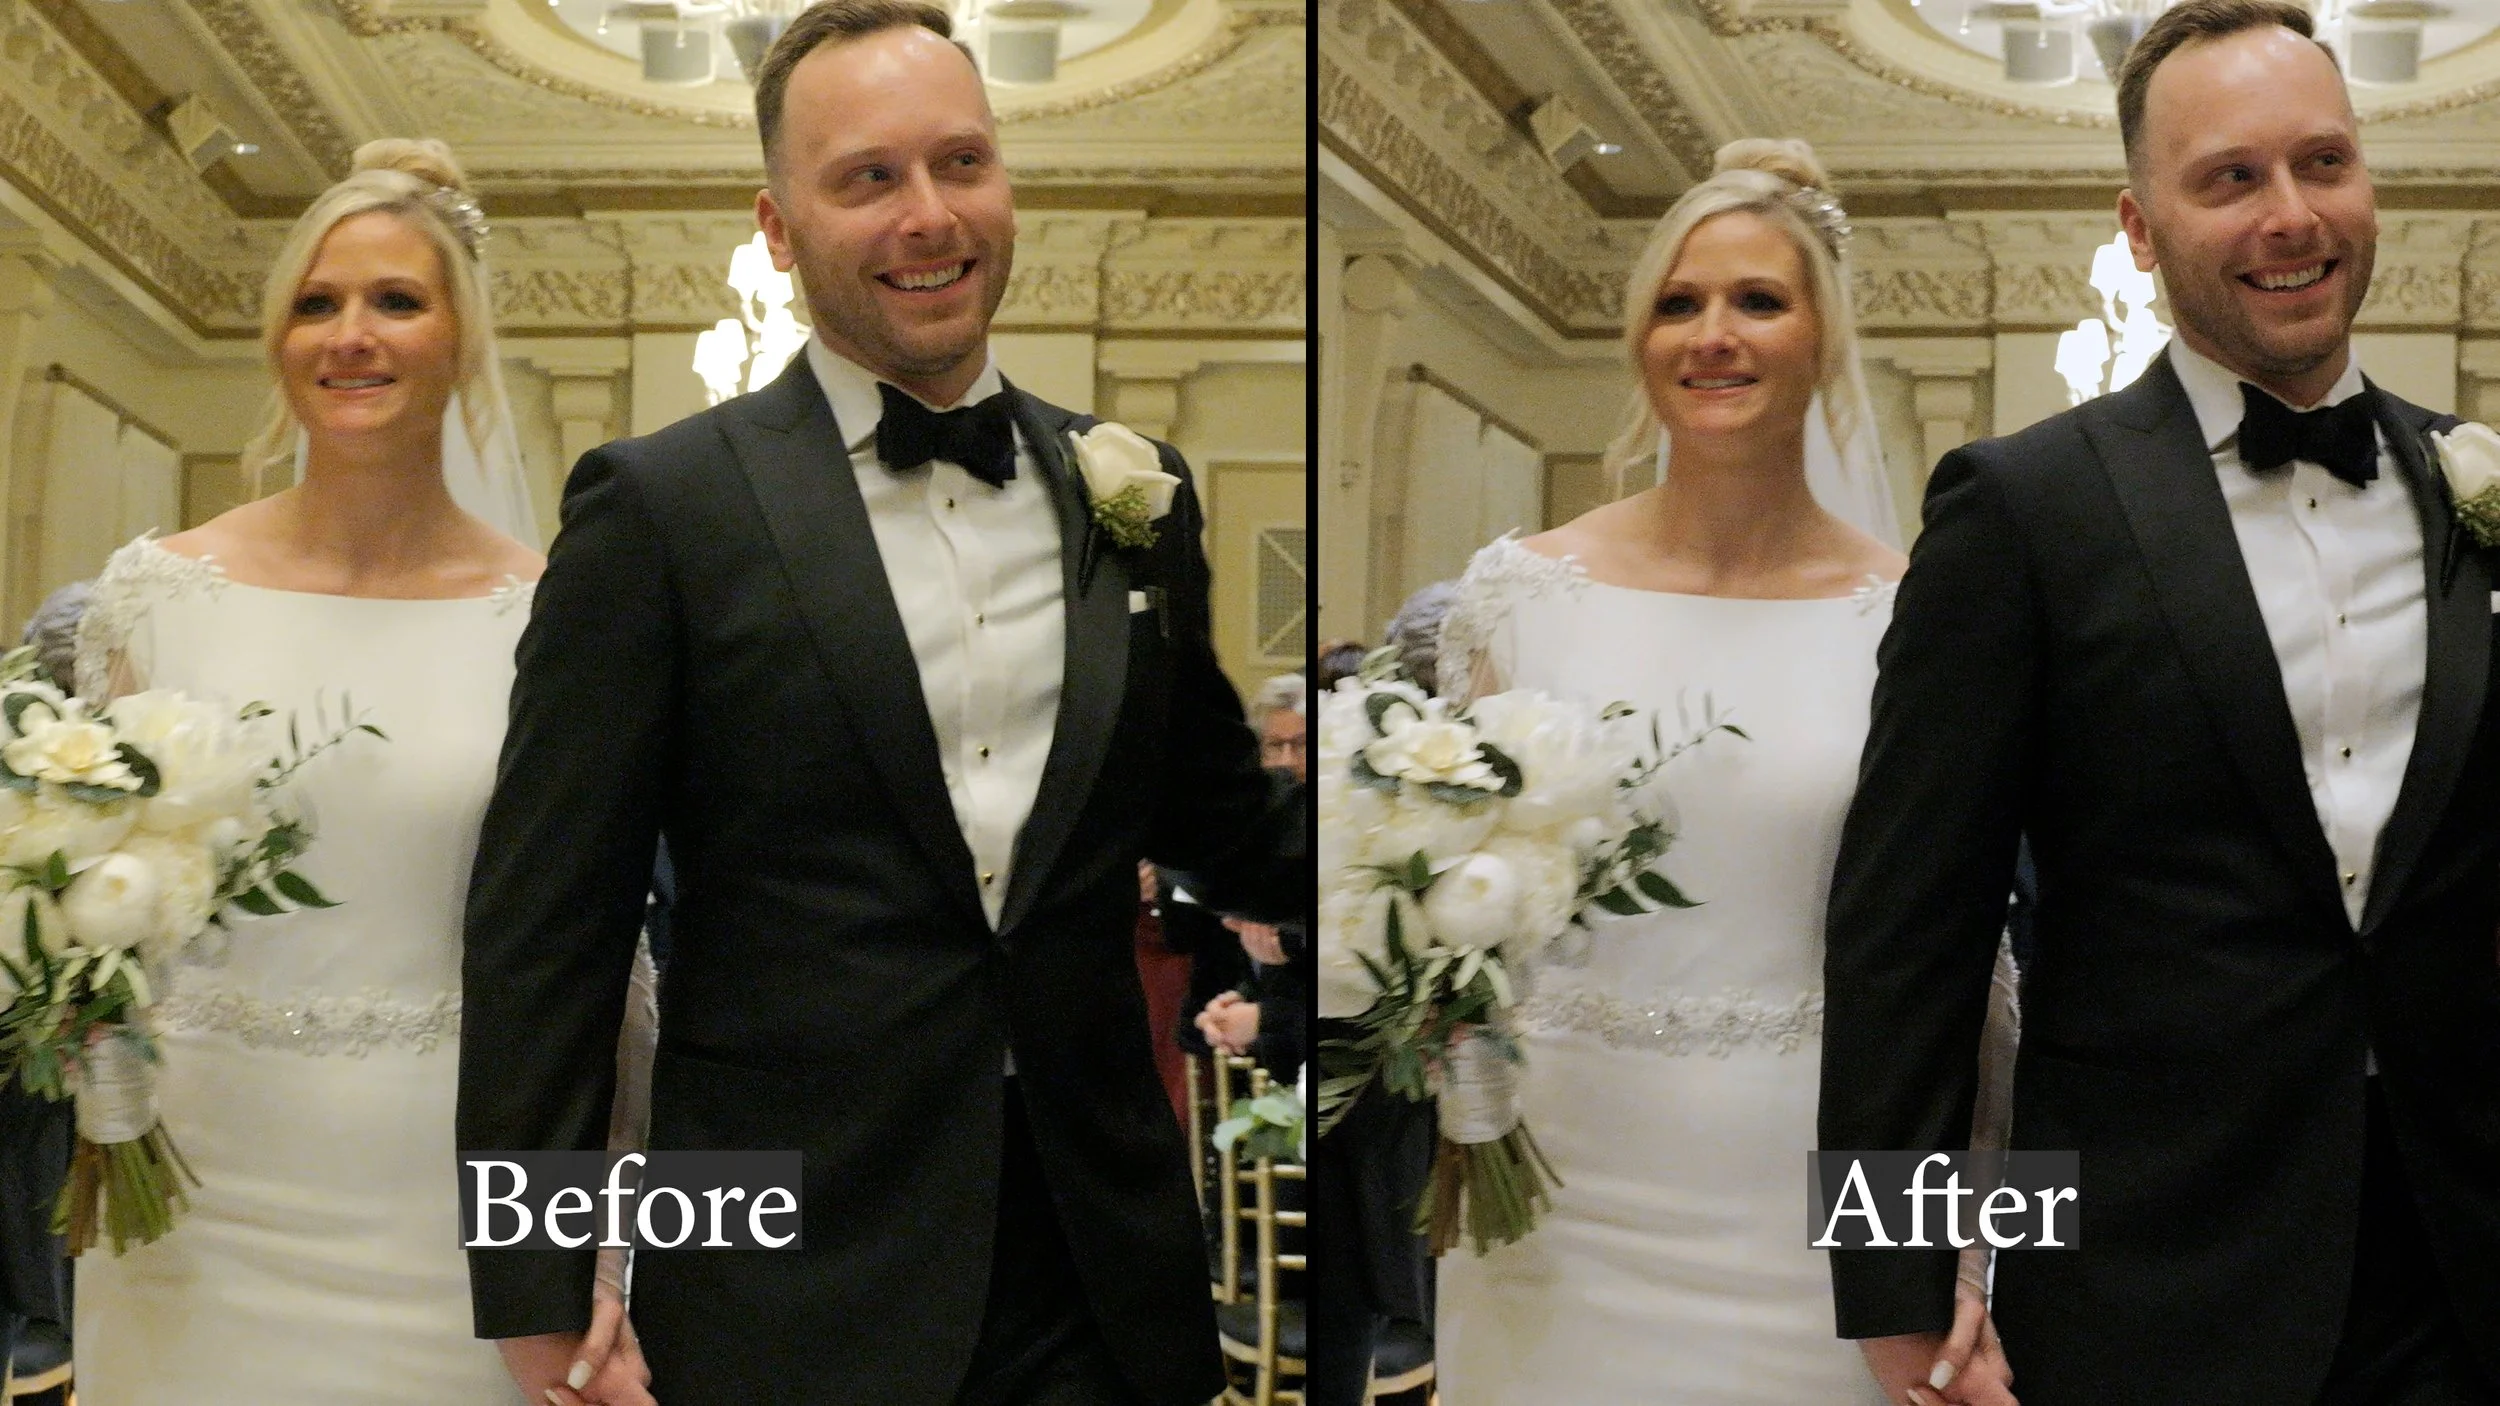
Part 7: Color Grading & Correction
Do not correct or grade the video clips themselves. Create 2 adjustment layers on the timeline above the video clips:
1st adjustment layer is for correction- white balance, saturation, contrast, shadows
2nd adjustment layer is for grading- Use the custom Annagh6 LUT @ 100% (download here)


Step 8: Exporting & Notes
Export highlights as mp4’s in 23.976 fps
Do not use downloaded transitions (jump cuts and opacity fades only)
No dips to black in any of the videos please.
Please export 2 versions of the short highlight
1 fully edited version labeled: “Couple name 1 + Couple name 2 Highlight”
example: John + Jane Highlight
1 version with no coloring & no audio track labeled: “No color or music Couple name 1 + Couple name 2 Highlight”
example: No color or music John + Jane Highlight
Examples
BRIAN + EVELYN
The wedding videographer wasn’t able to capture any prep footage AND their wasn’t really any funny audio to use. The editor was still able to jumpcut to the beat, use clips of the bride laughing & make the edit emotionally engaging.
MARGOT + BRETT
This editor did a great job picking lively clips of the couple and started with a great origin story that made the audience laugh.
LIAM + ARNEL
This editor skipped step 3 but because they used such great audio and video clips, everything worked!